Giving Color And Texture To Objects
To start experimenting with coloring, make sure to use object mode, then select the desired object to be colored. Then click material properties, then select new material. Like picture 1.
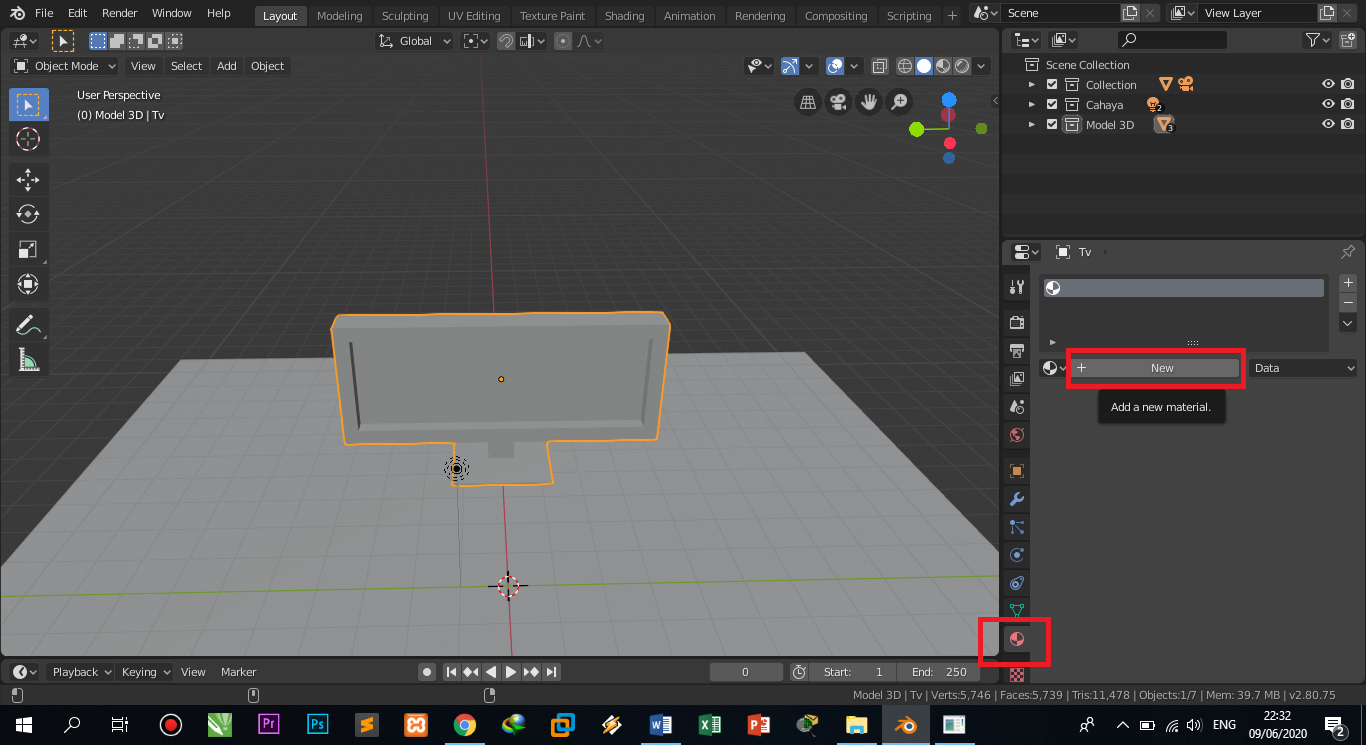 |
| Figure 1. Adding materials |
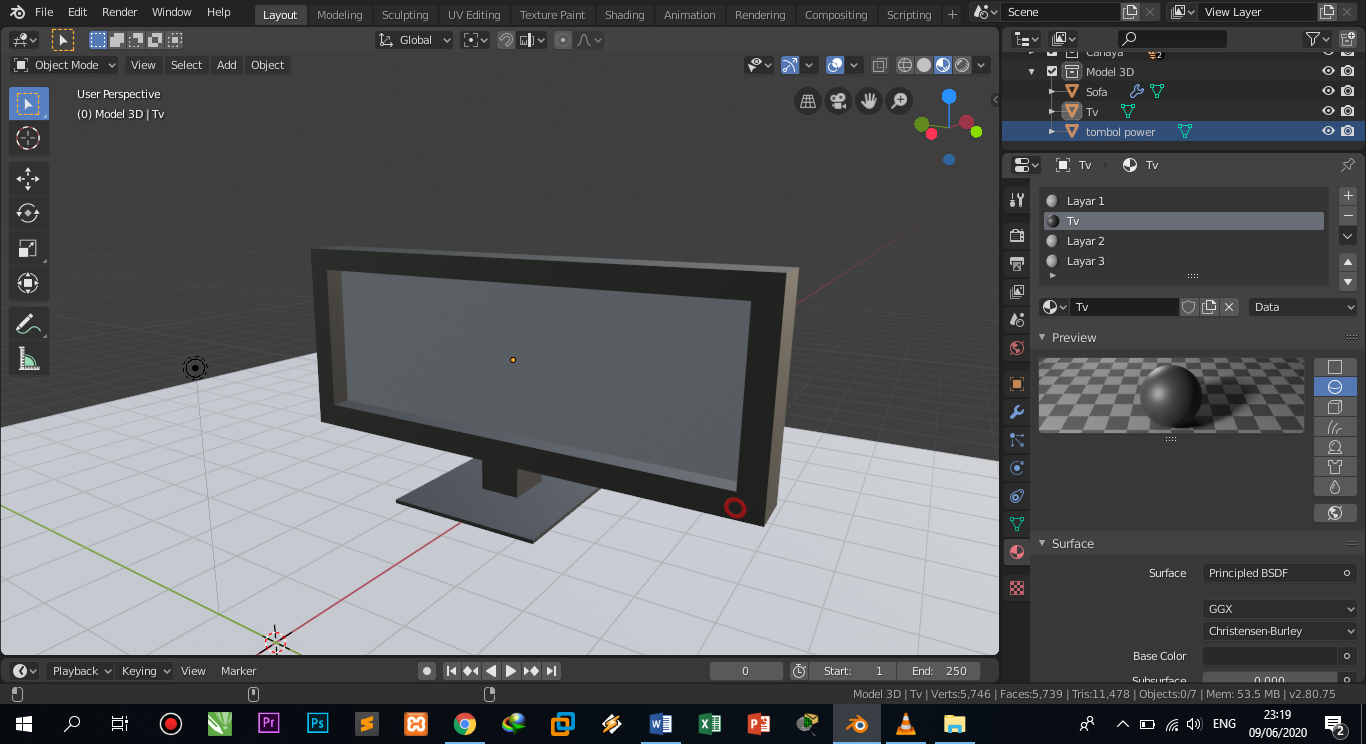
Then click the surface tab to bring up other options, then click the white base color (in the image it's a dark color, because I chose dark color) to bring up the color choices, and choose the color you want. Like picture 2.
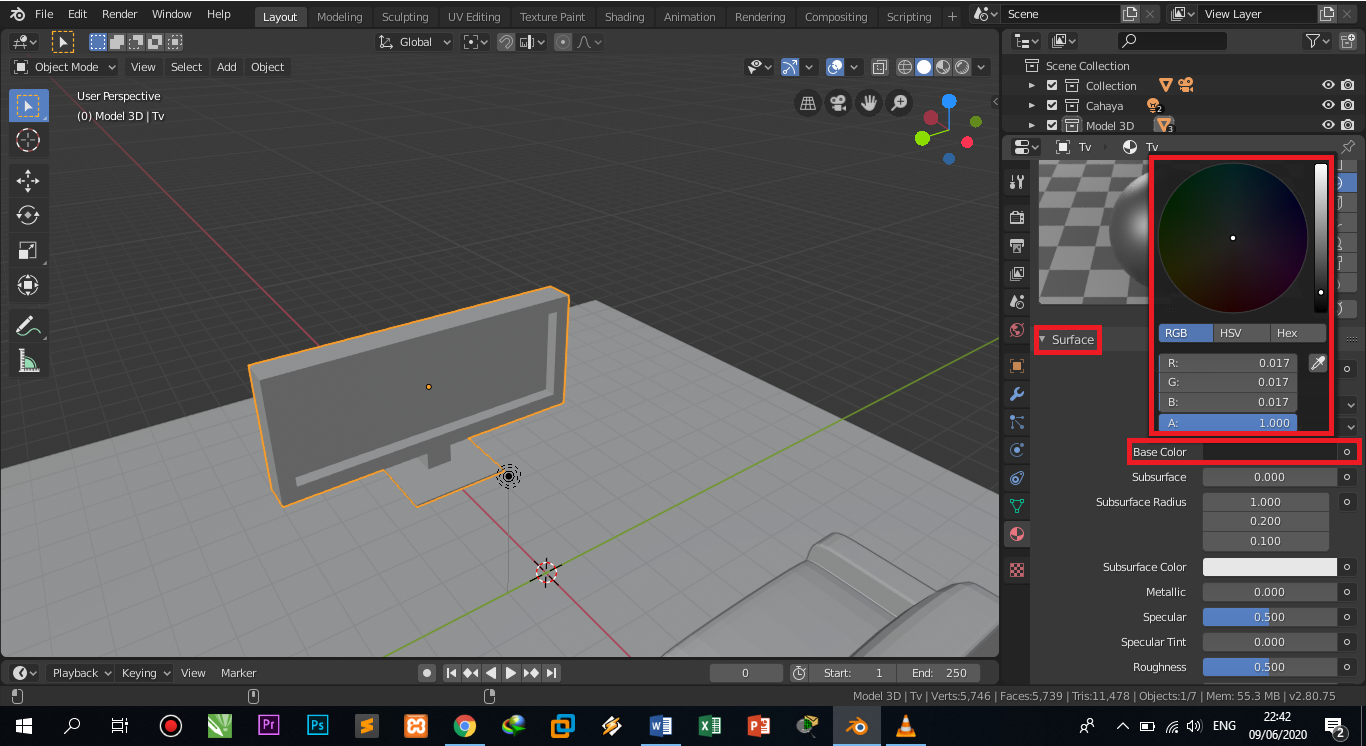 |
| Figure 2. Giving color to the tv object |
Then I will give color to the tv power button, the method is the same as above.
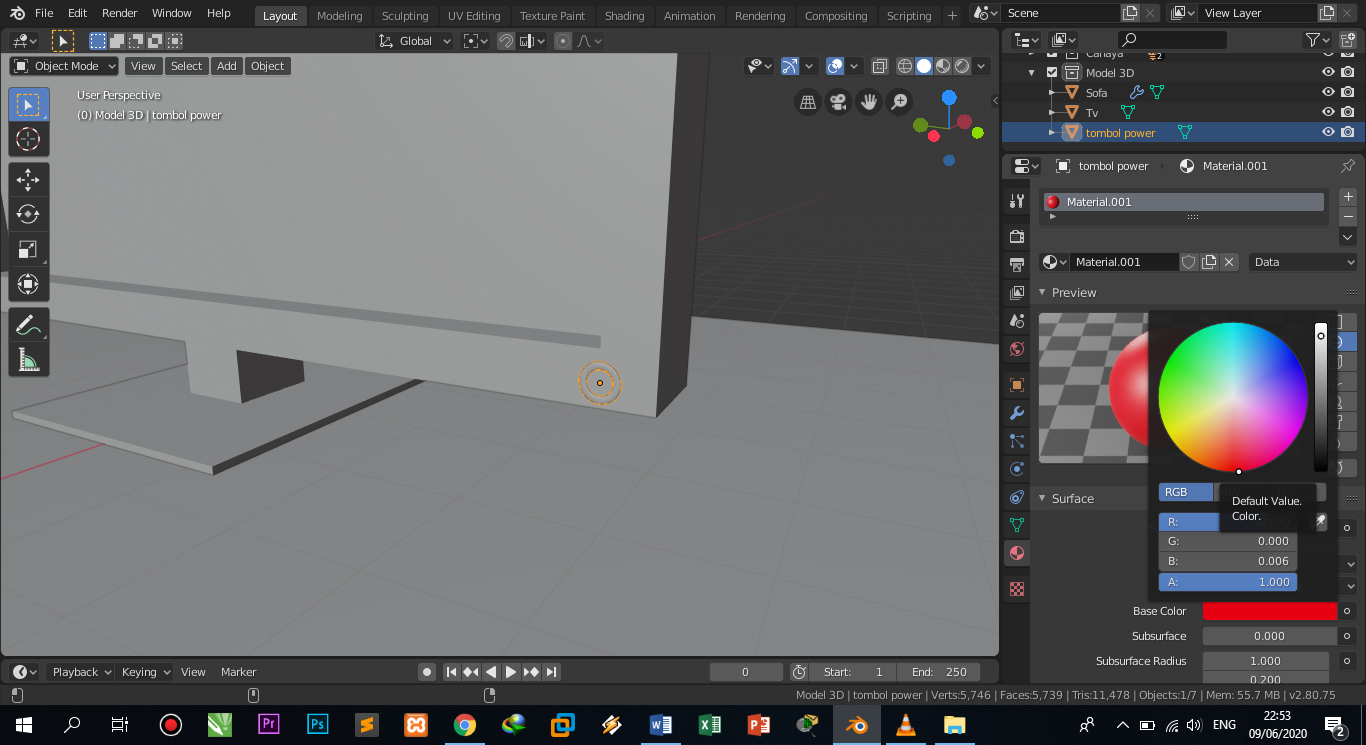 |
| Figure 3. Coloring the power button object |
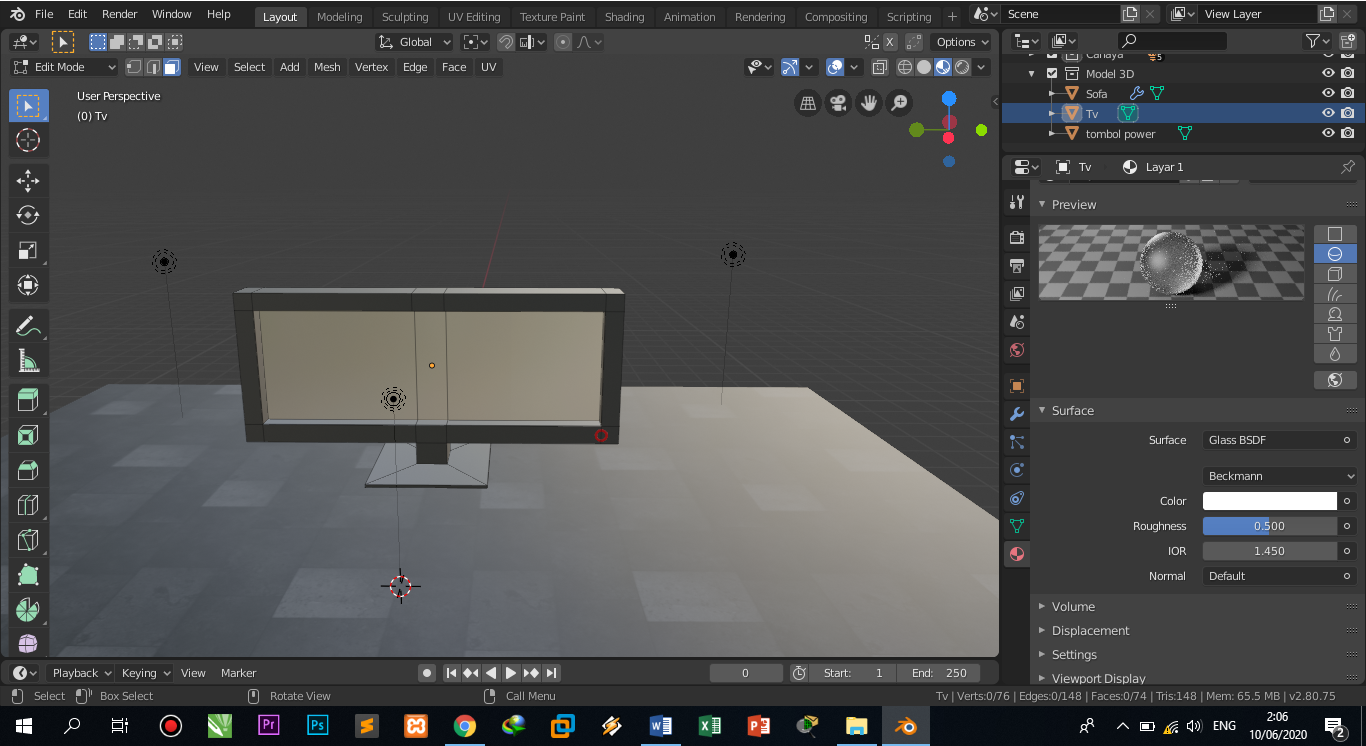
Next, give color to the screen/glass of the TV, the method is slightly different, it's just that you have to enter edit mode first. Then click face select, then click object/screen, then click new material, then select the color you want, then click assign. Like pictures 4 and 5. So assign itself is like separating colors in one object.
 |
| Figure 4. Giving color to objects/tv screens |
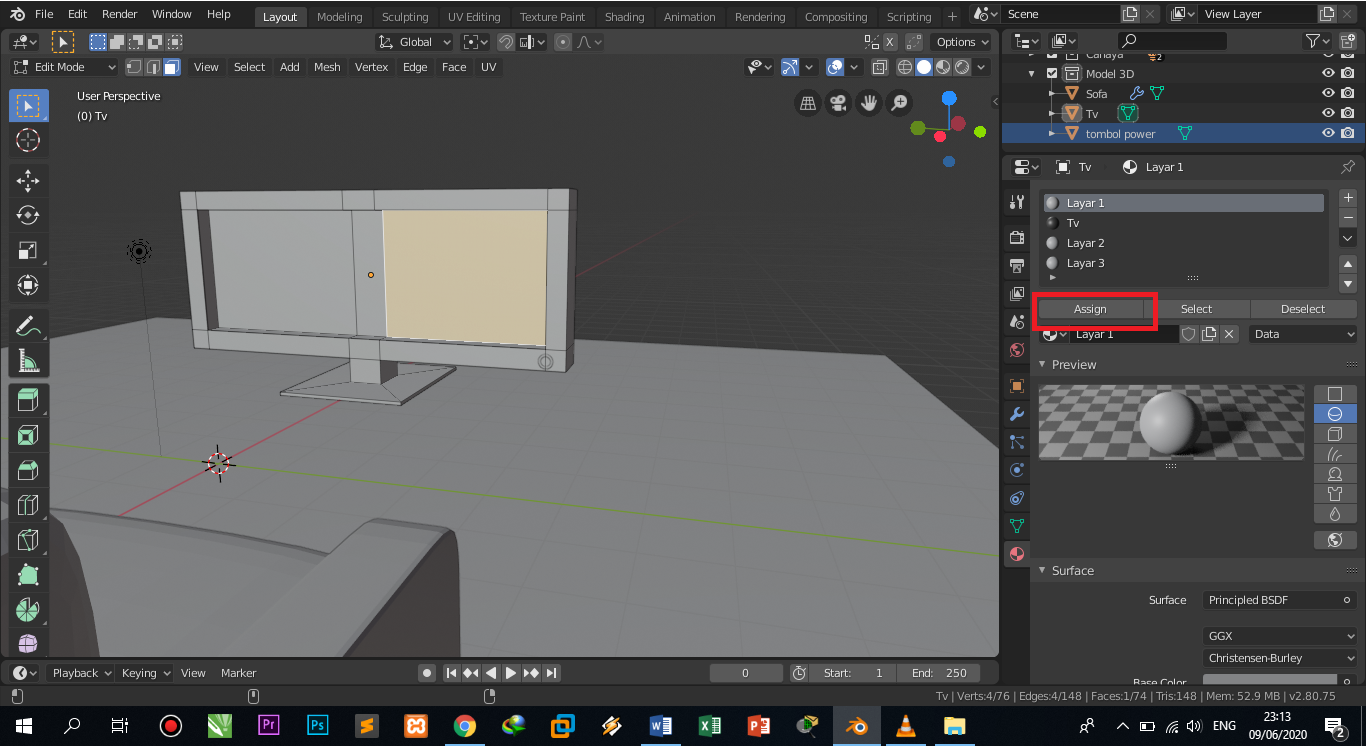 |
| Figure 5. Giving color to objects/tv screens |
 |
| Figure 6. Display in 3D view mode |
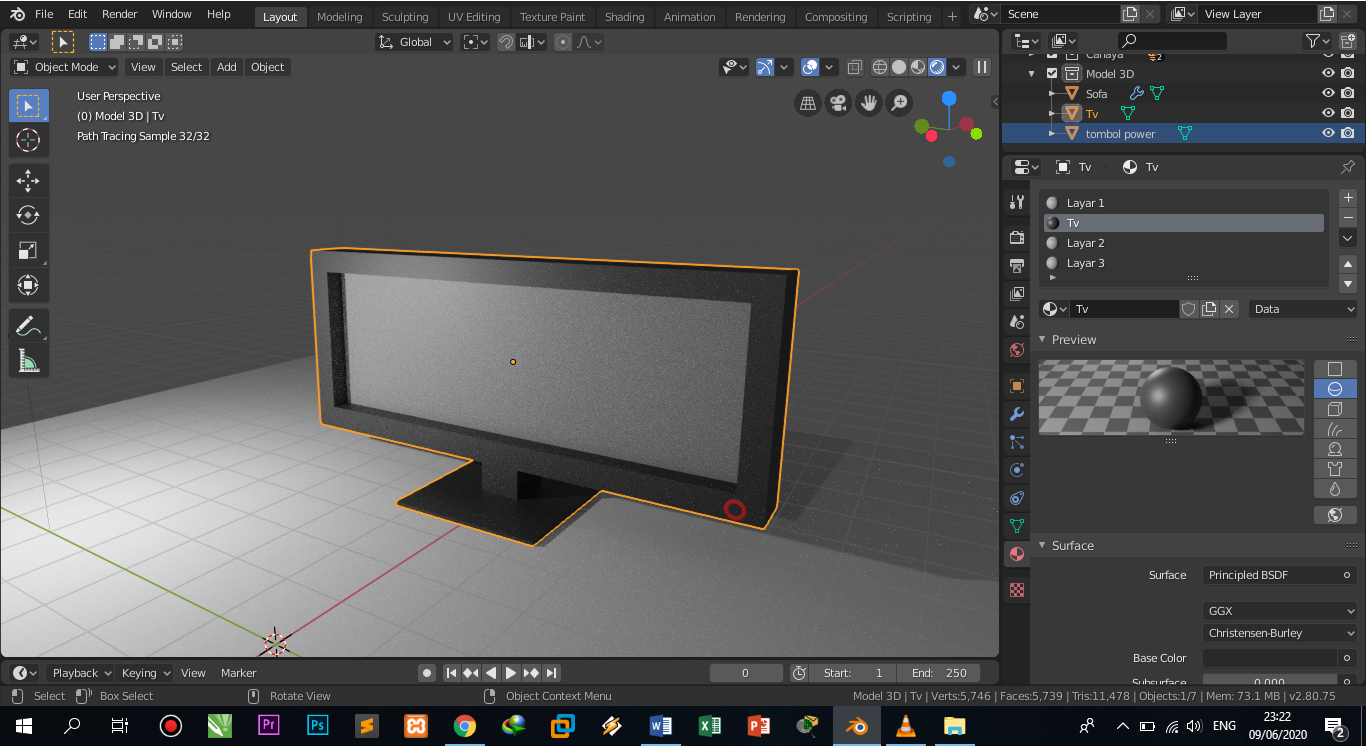 |
| Figure 7. Display in rendered view mode |
Give Textures
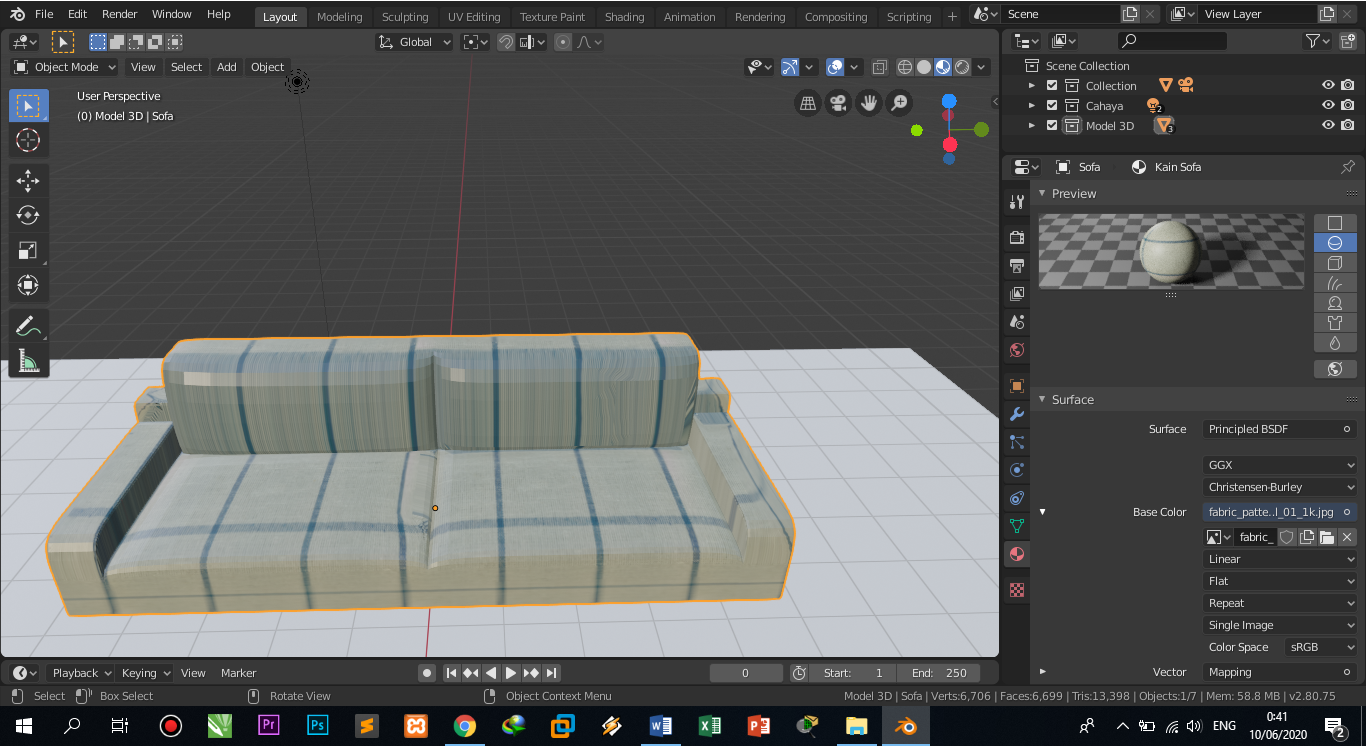
To start experimenting with texture, make sure it's in object mode and select the object. Then select the material tool, then new material, then select the small circle that is in the base color, and select the image texture. Like picture 8.
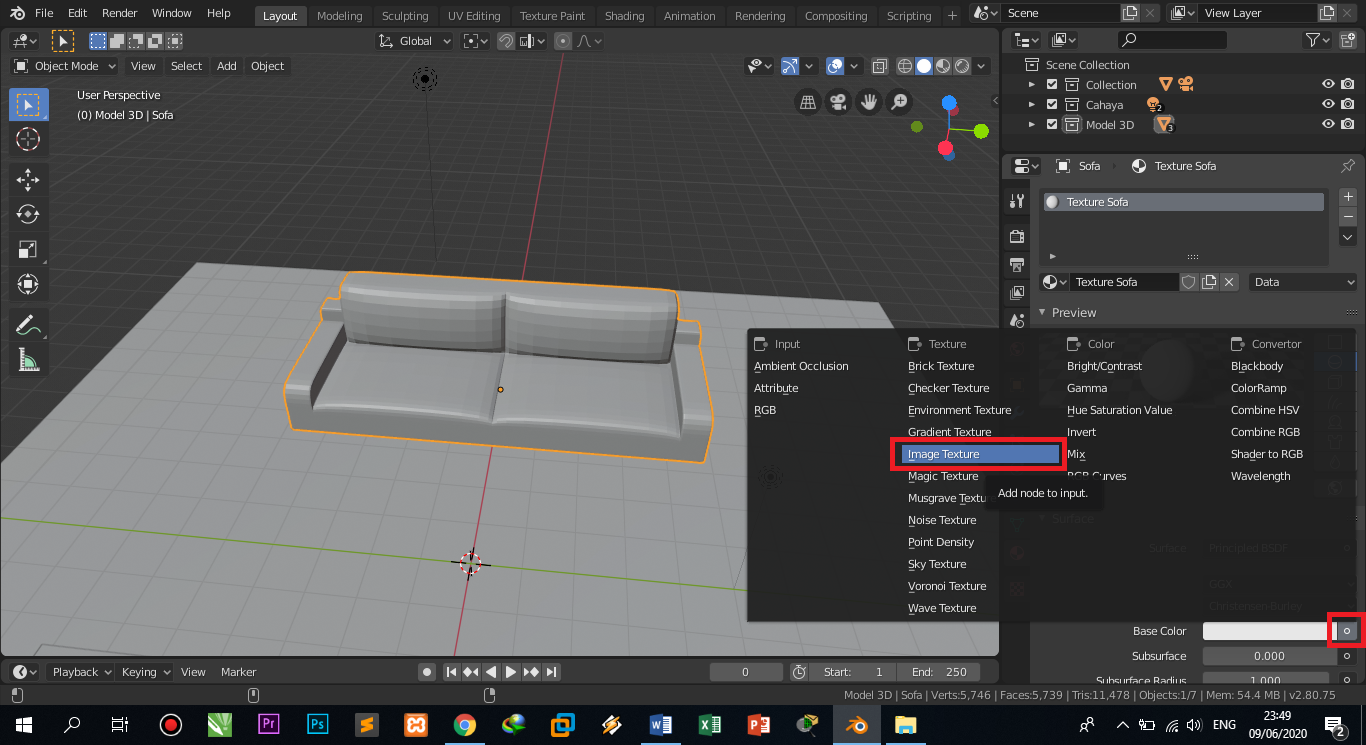 |
| Figure 8. Adding texture |
Then open it and look for the image/texture that has been downloaded. Like pictures 9 and 10.
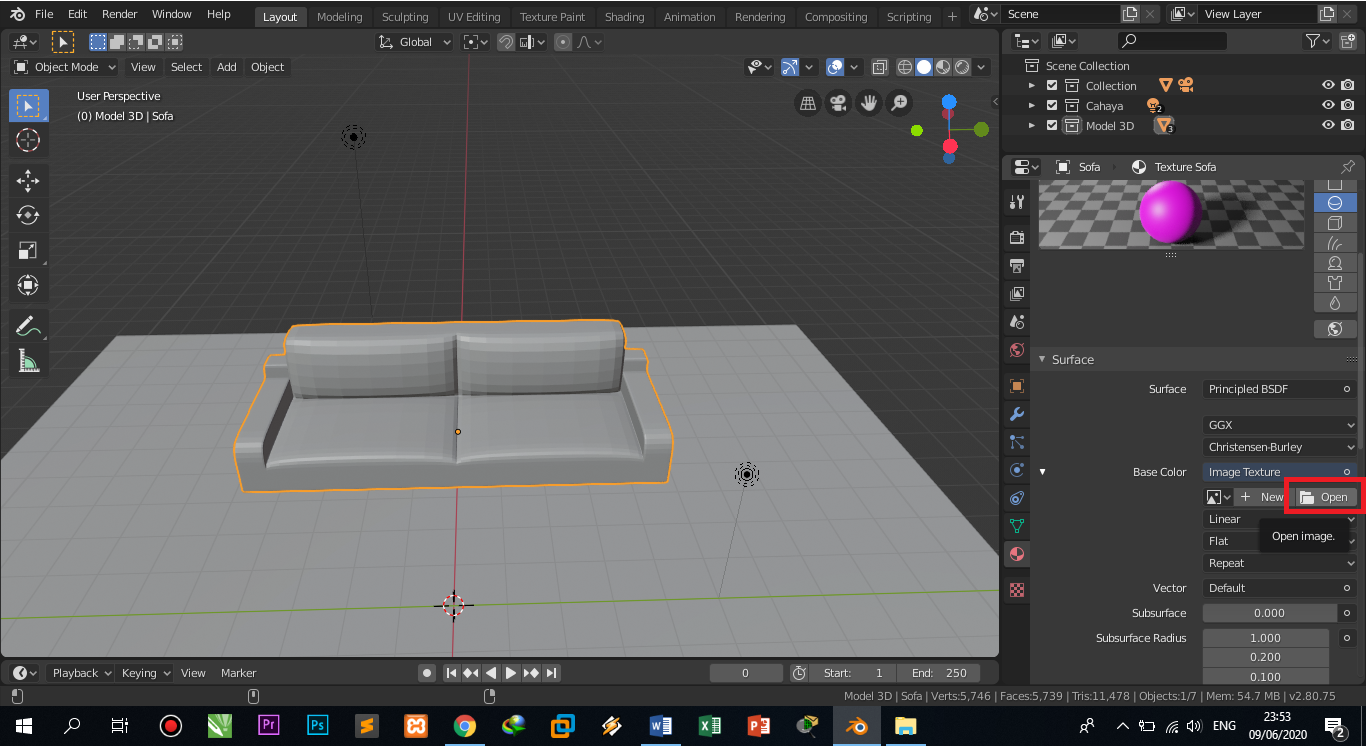 |
| Figure 9. Opening the image folder |
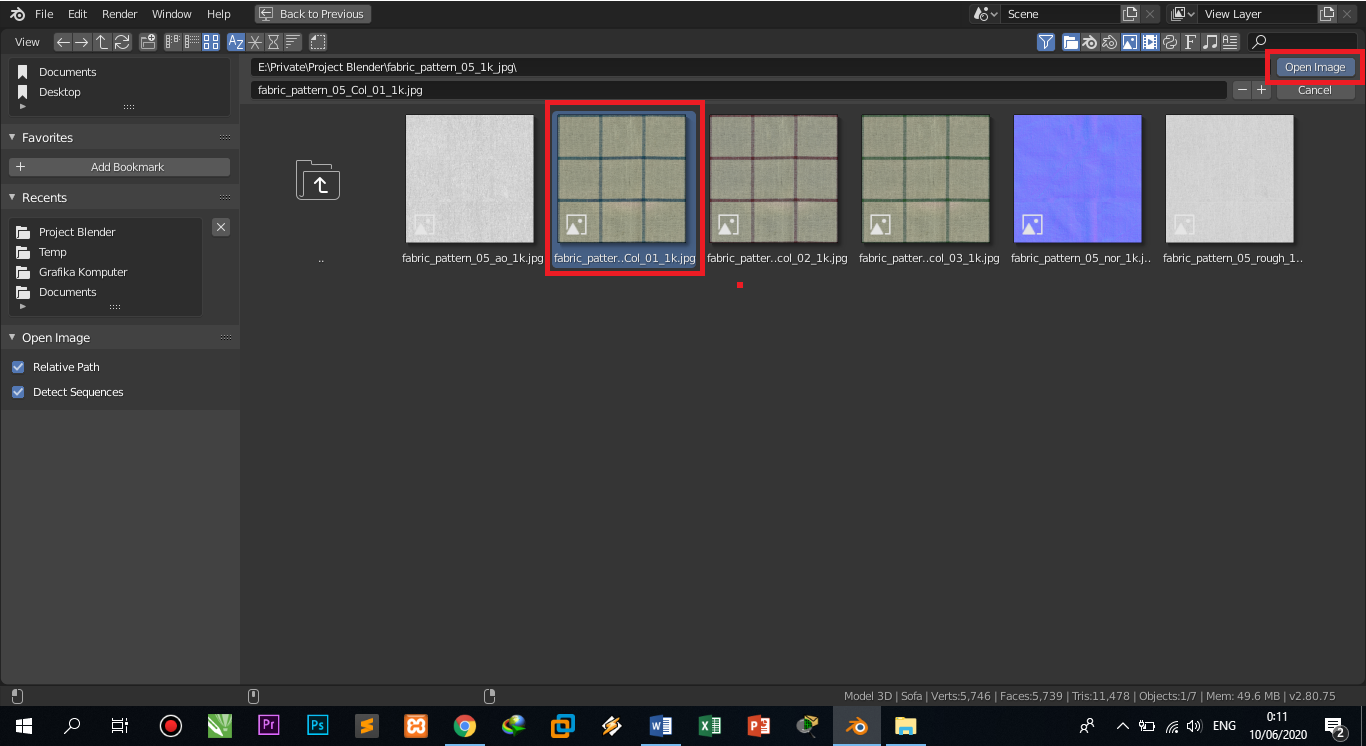 |
| Figure 10 Search for and open images |
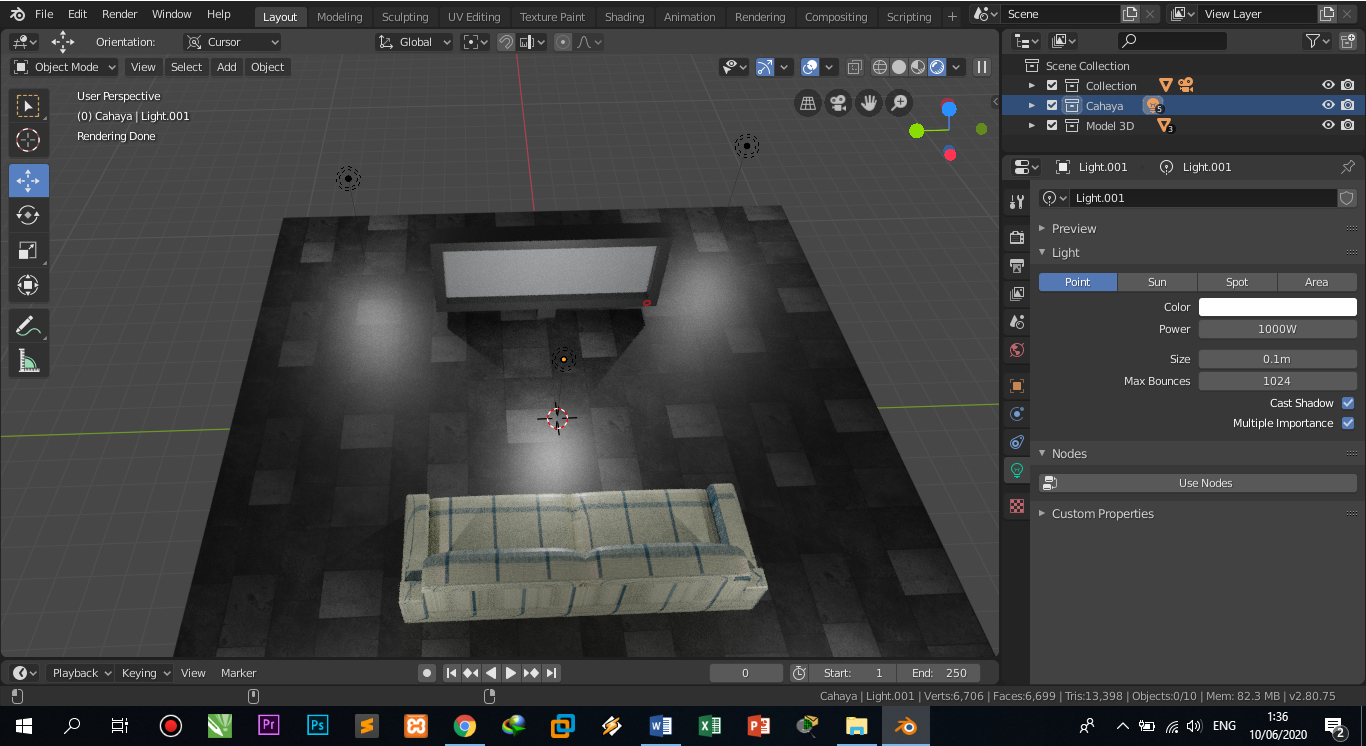
The 3D view in Figure 11 and the rendered view in Figure 12.
 |
| Figure 11. 3D view |
 |
| Figure 12. Display rendered view |
Texture Modification
In pictures 11 and 12, the results are actually not as neat as that, but I forgot to take a screenshot, but I took a screenshot of the texture modification. So the first step is to click the edit menu, then click preferences, then click add-ons, then type node in the search field and enter. After that check the box as shown in Figure 13.
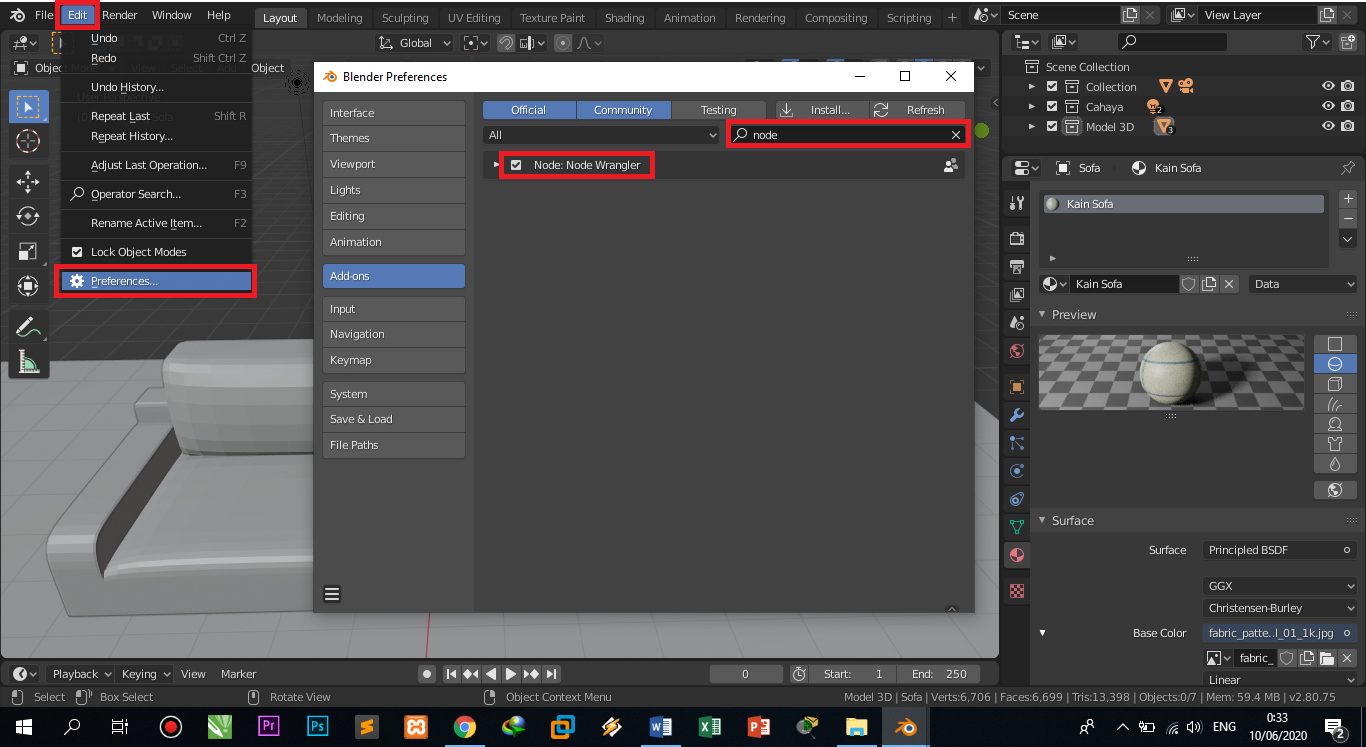 |
| Figure 13. Adding wrangler node add-ons |
Then switch to the shading menu, it will appear as shown in figure 14, after that press ctrl+t according to the description in figure 14, then 2 nodes will appear. Then to tidy up the texture, I just change the scale according to figure 14. And the final result is like figure 11 or 12.
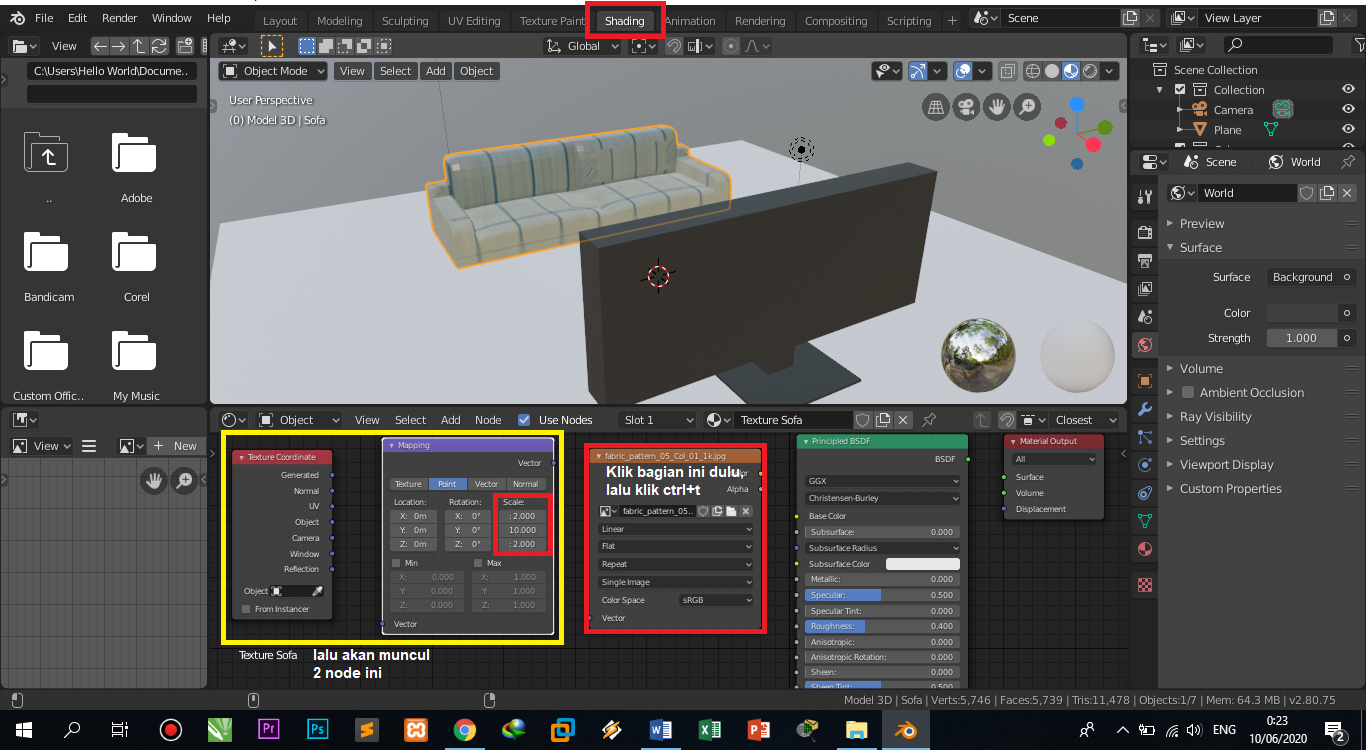 |
| Figure 14. Texture modification |
Next I will add texture to the floor, and the method is the same as adding texture to the sofa. And to modify the texture on the floor, the method is the same as the sofa.
 |
| Figure 15. 3D view |
 |
| Figure 16. Display rendered view |
Create a Glass Texture
To create a glass texture on an object, use the glass material. If so, just create a new material, then click the small circle on the surface.
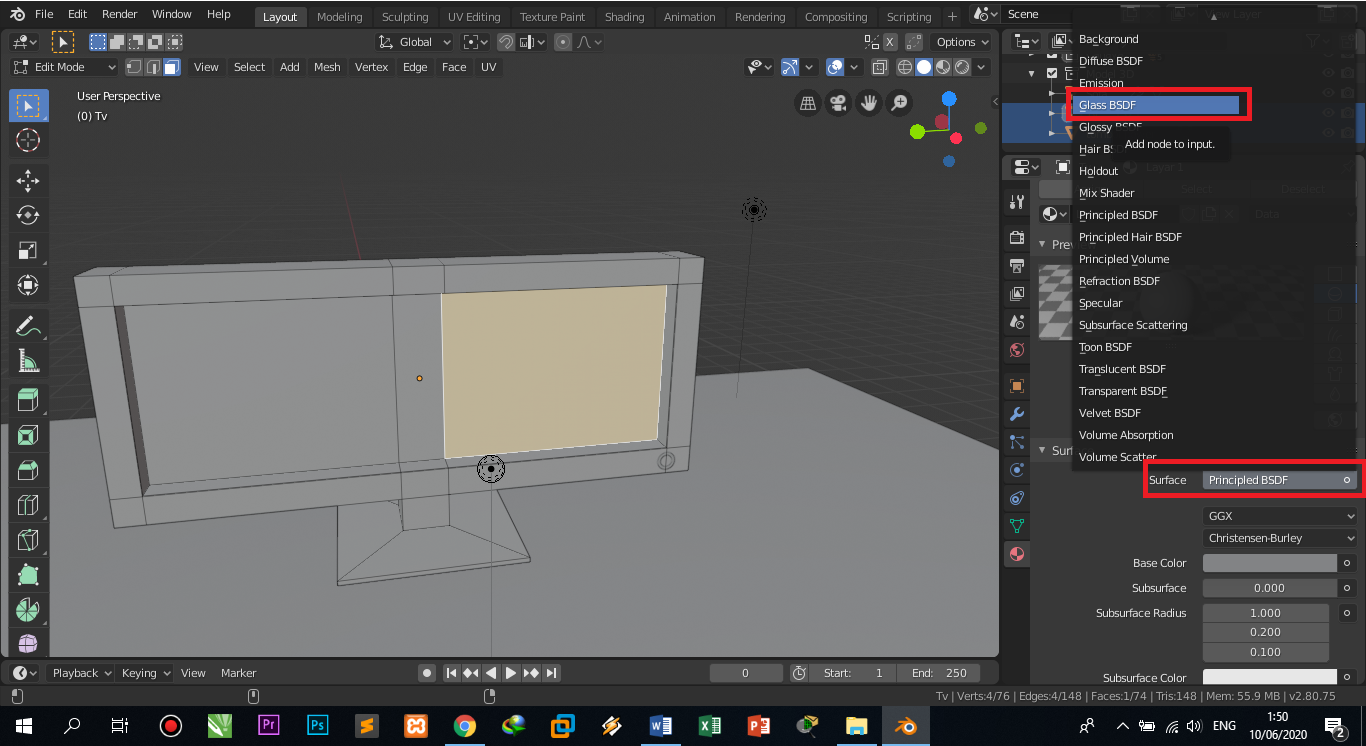 |
| Figure 17. Adding the BSDF glass effect |
After the screen is given a glass effect with default roughness.
 |
| Figure 18. After being given a glass effect |
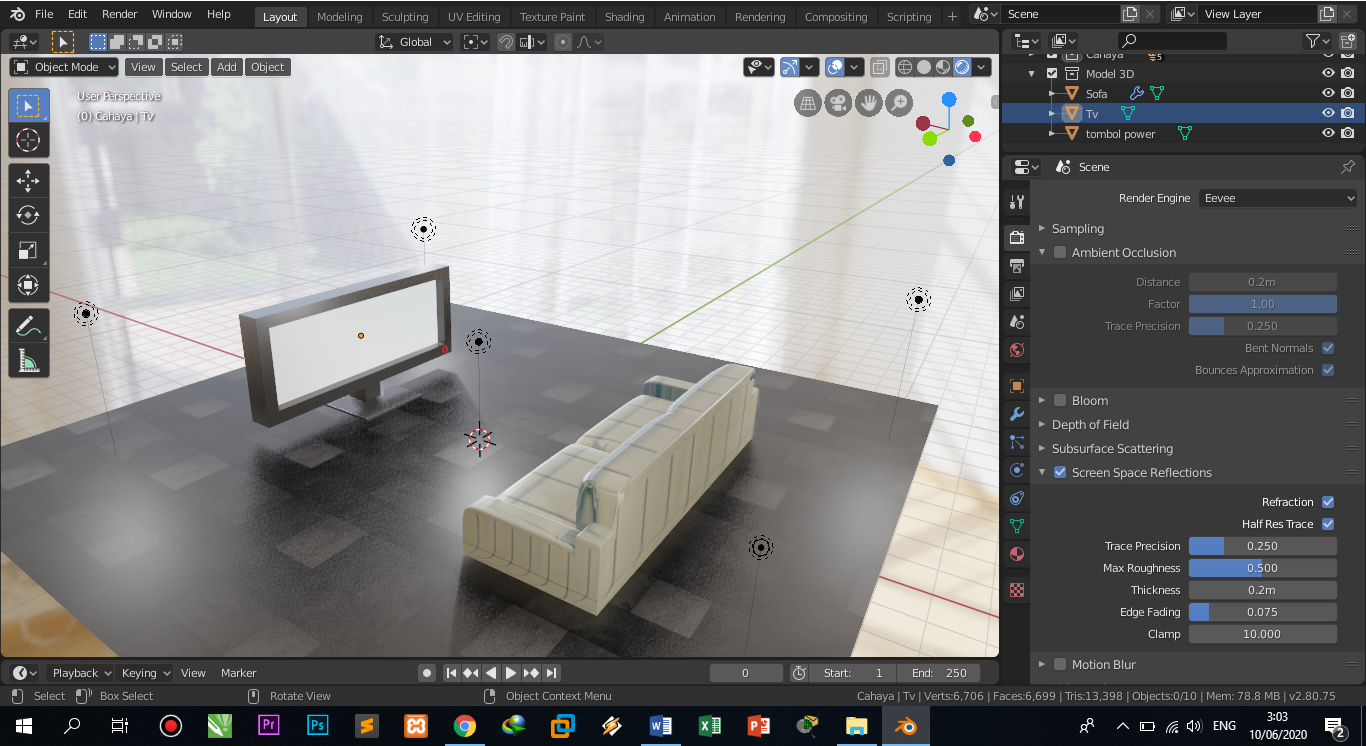
Next, modify the lighting from the tv screen glass effect. Go to render properties, then check screen space reflection, then check refraction.
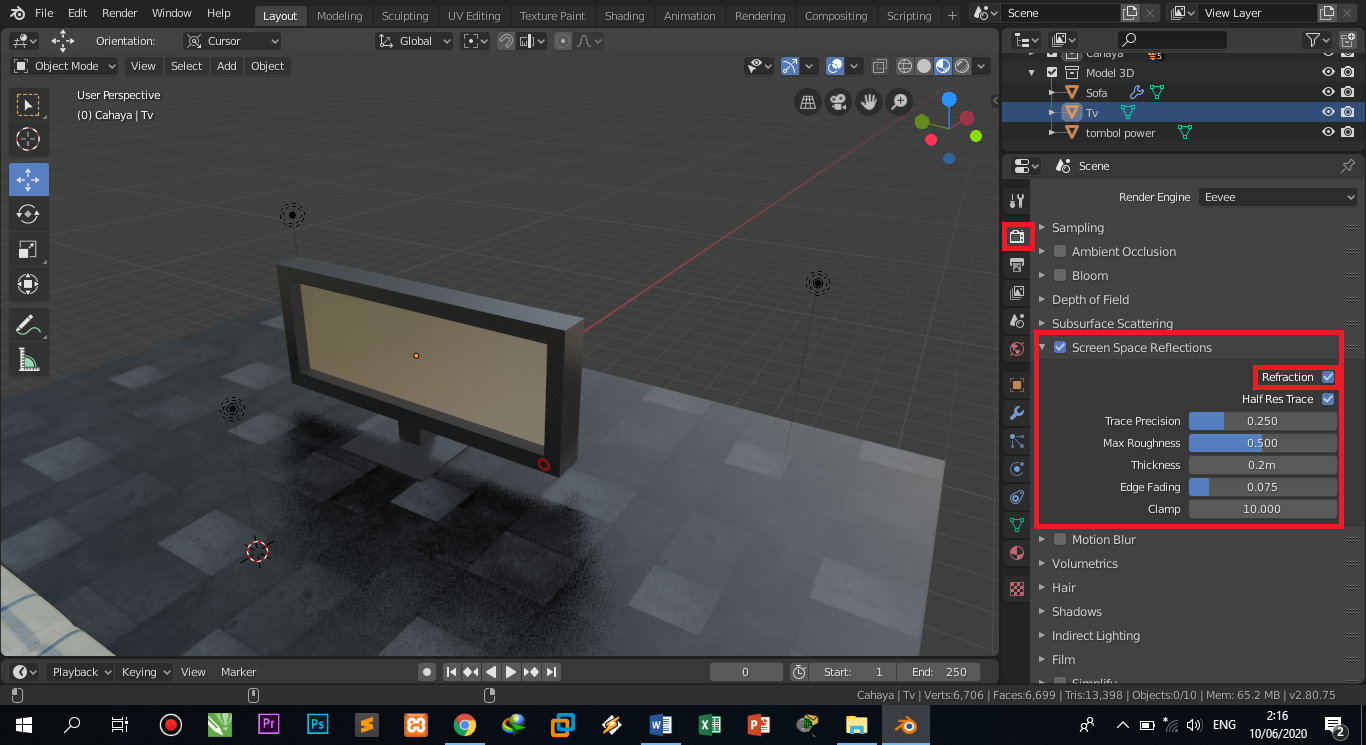 |
| Figure 19. After modifying |
Gives a Textured Background
To add a background, immediately click on world properties, then select the small circle on the color, then select the environment texture.
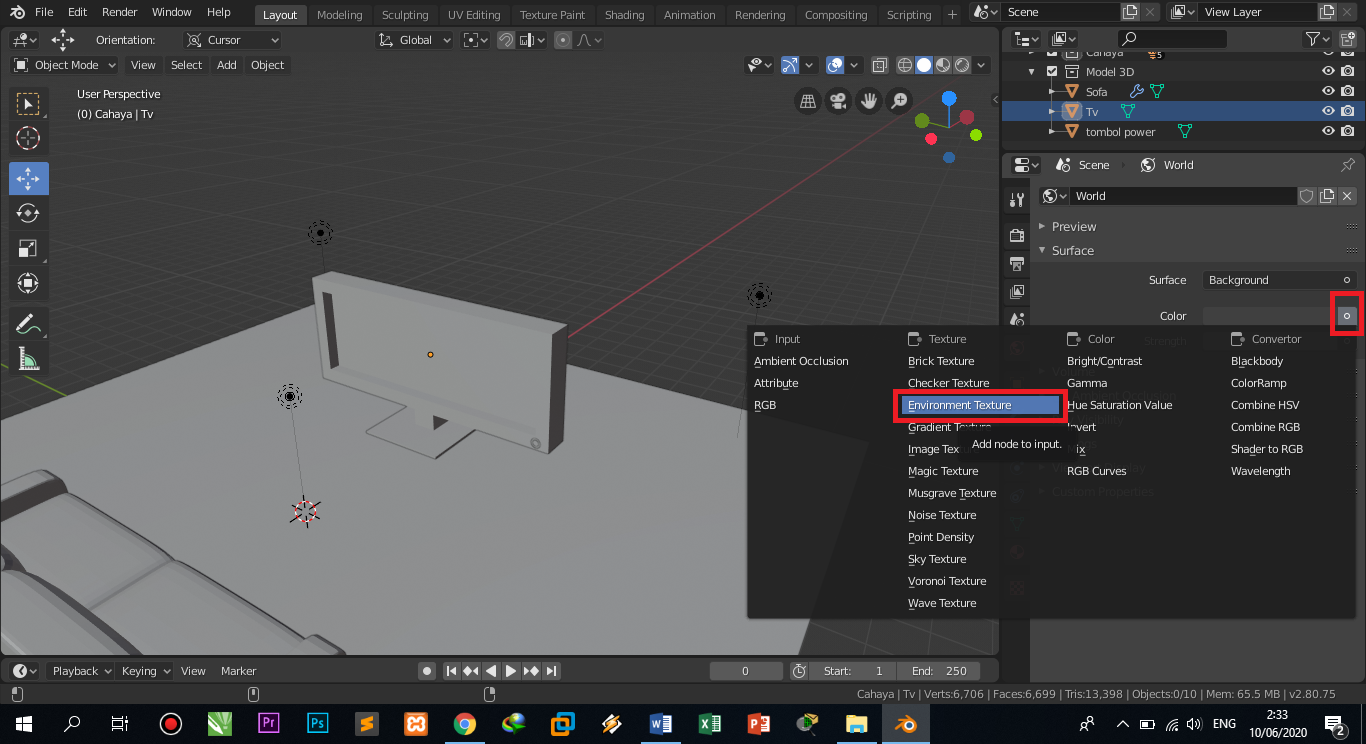 |
| Figure 20. Adding a background (HDR) |
After that, look for and open the background, like in pictures 21 and 22 how it looks after opening the image.
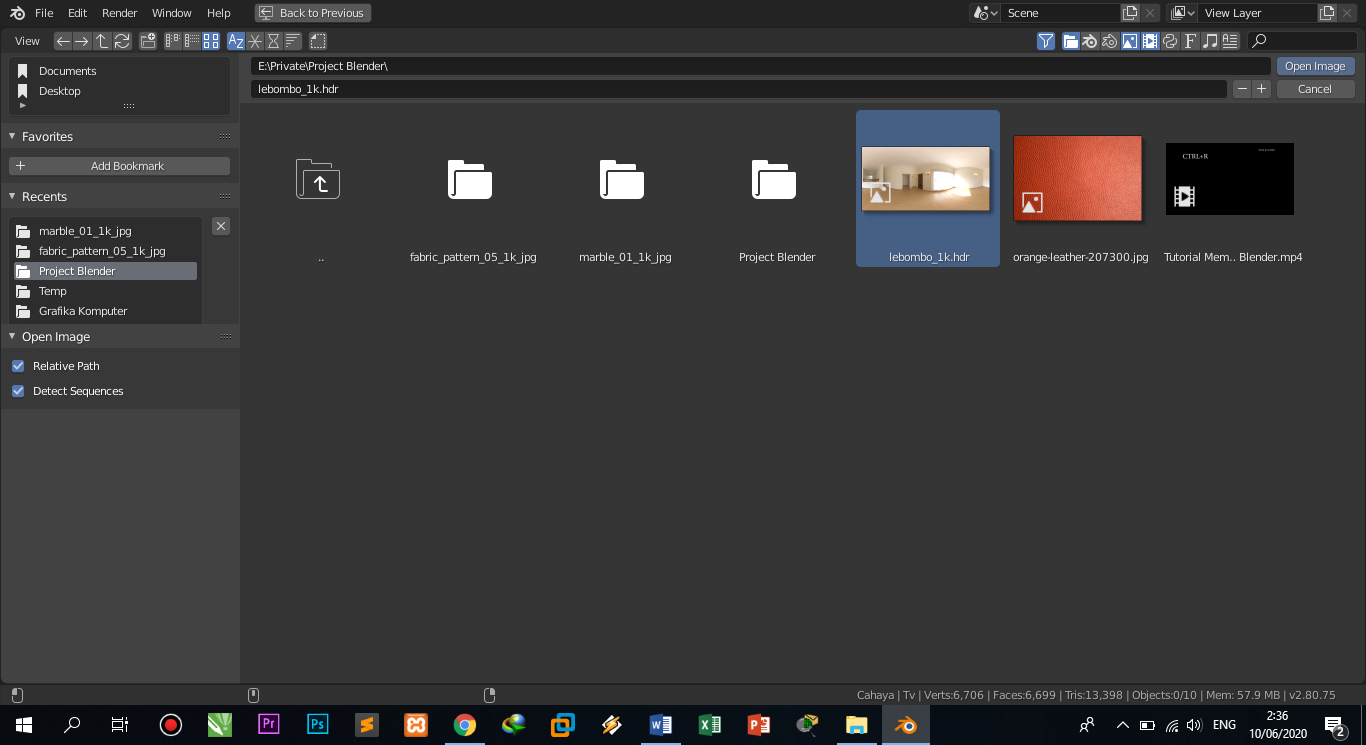 |
| Figure 21. Finding the background and opening it |
 |
| Figure 22. After the background is added |
Lighting
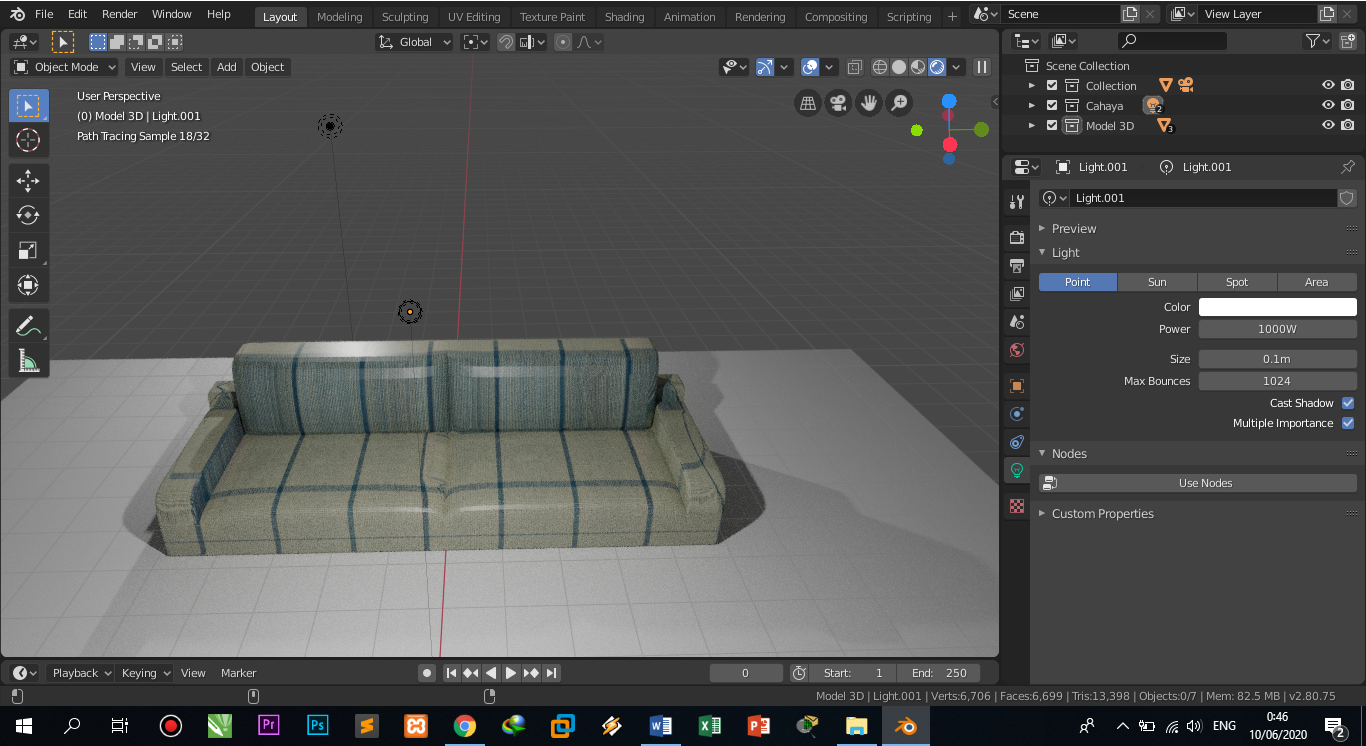
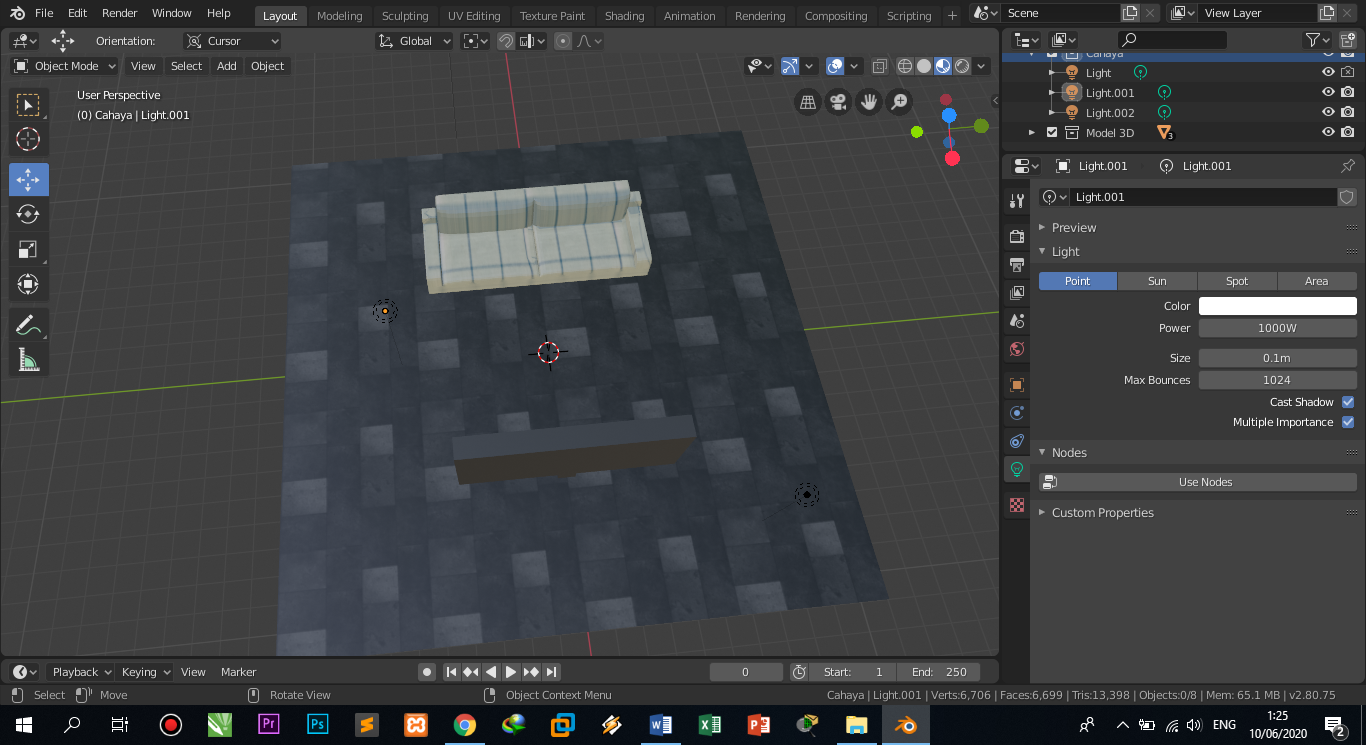
To do the lighting, you can directly select the light object, then click on the data object, the light settings automatically appear, then change it to render view mode. Then click sun to adjust the light. Then change the strength and specular as desired.
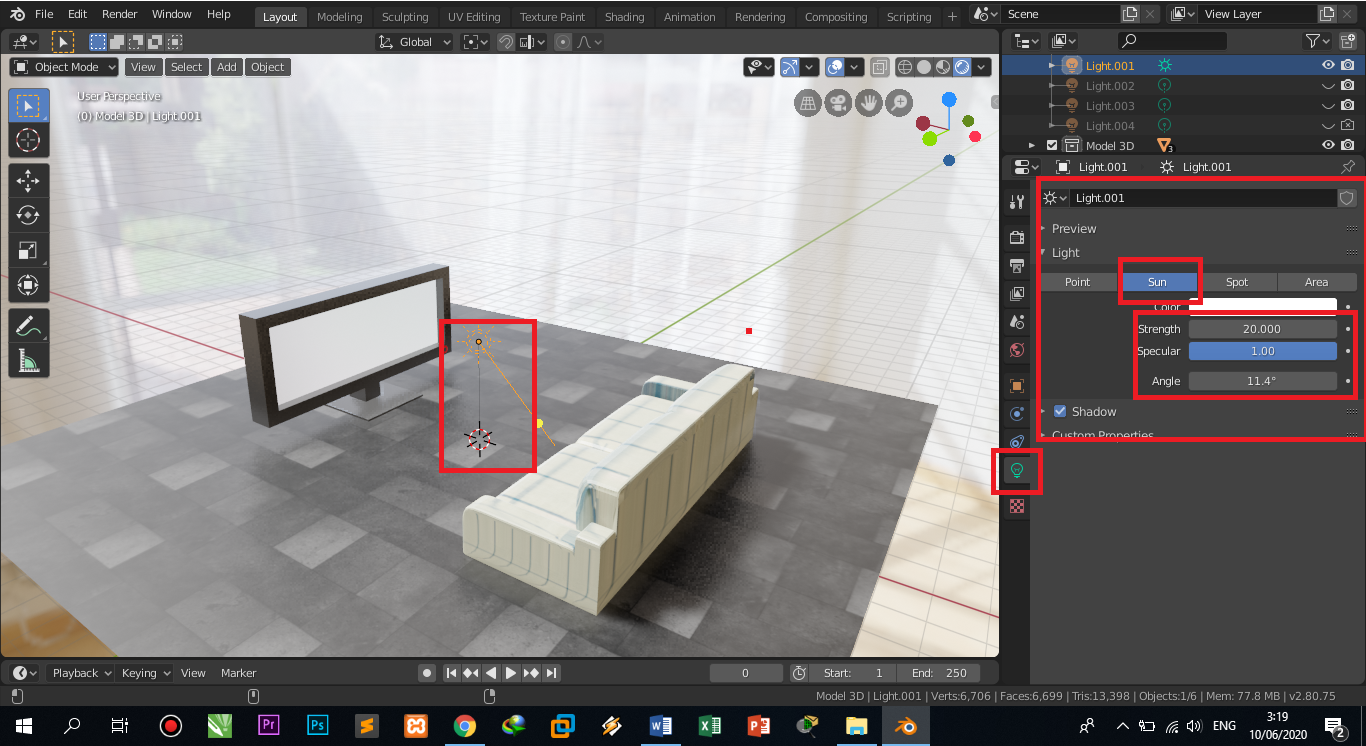 |
| Figure 23. Adjusting the light |
After that switch to camera mode, just press shortcut 0, then set the direction of lighting, so you can get a good view, and you can also lock the camera position, how to select the camera, then press shortcut n, then a transform menu will appear, but select / click the view menu, then click view lock, then check the lock camera to view.
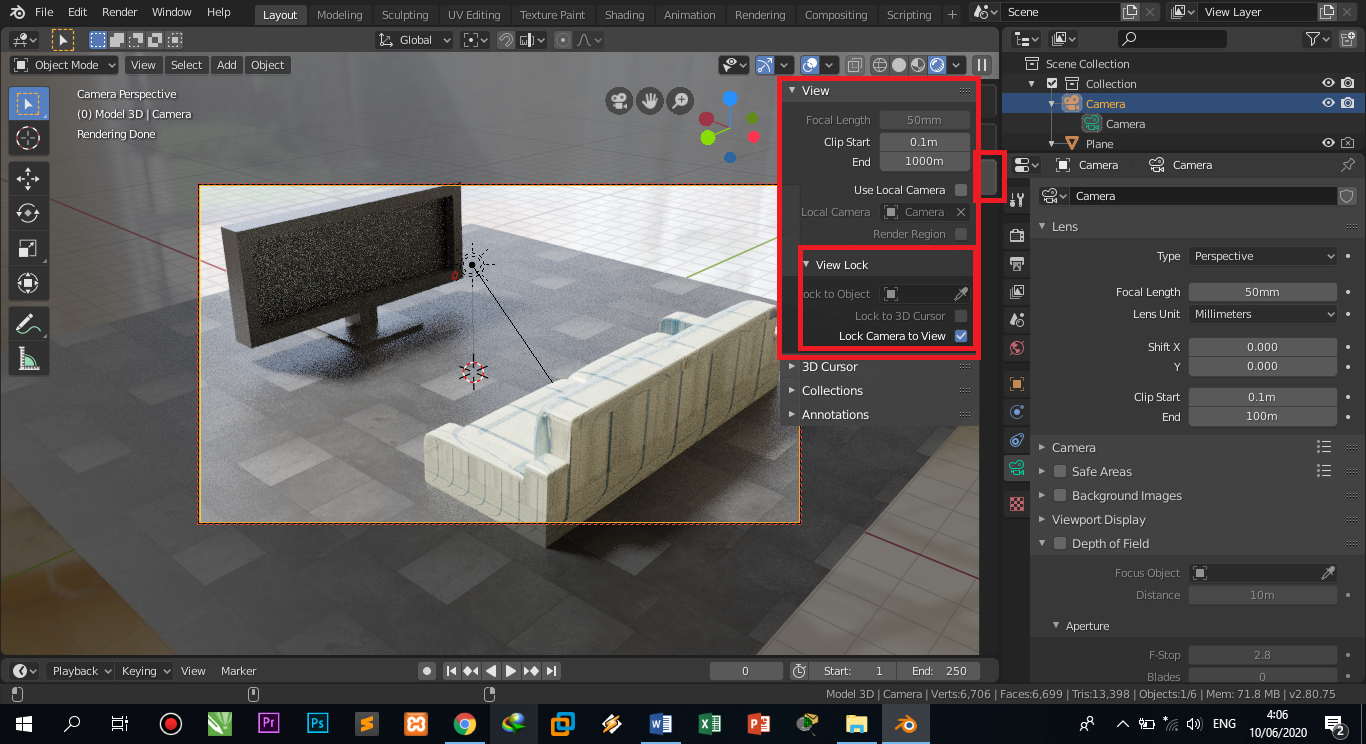 |
| Figure 24. Locking the camera |
Then render the object in the form of an image, at this stage the image can be saved in PNG format. Just click the output properties, then set as shown in Figure 25.
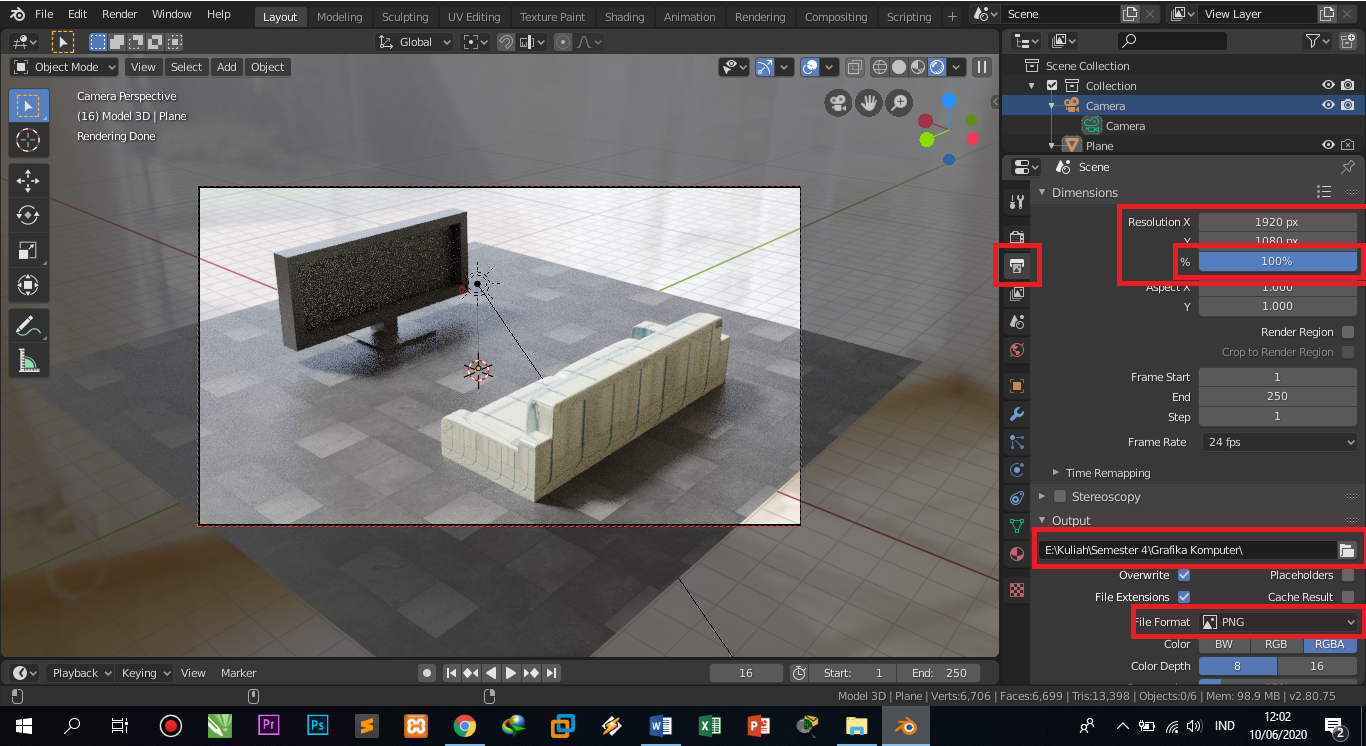 |
| Figure 25. Setting the render output |
After that the stage of rendering the image, select the render menu, then select render image or you can press f12 on the keyboard.
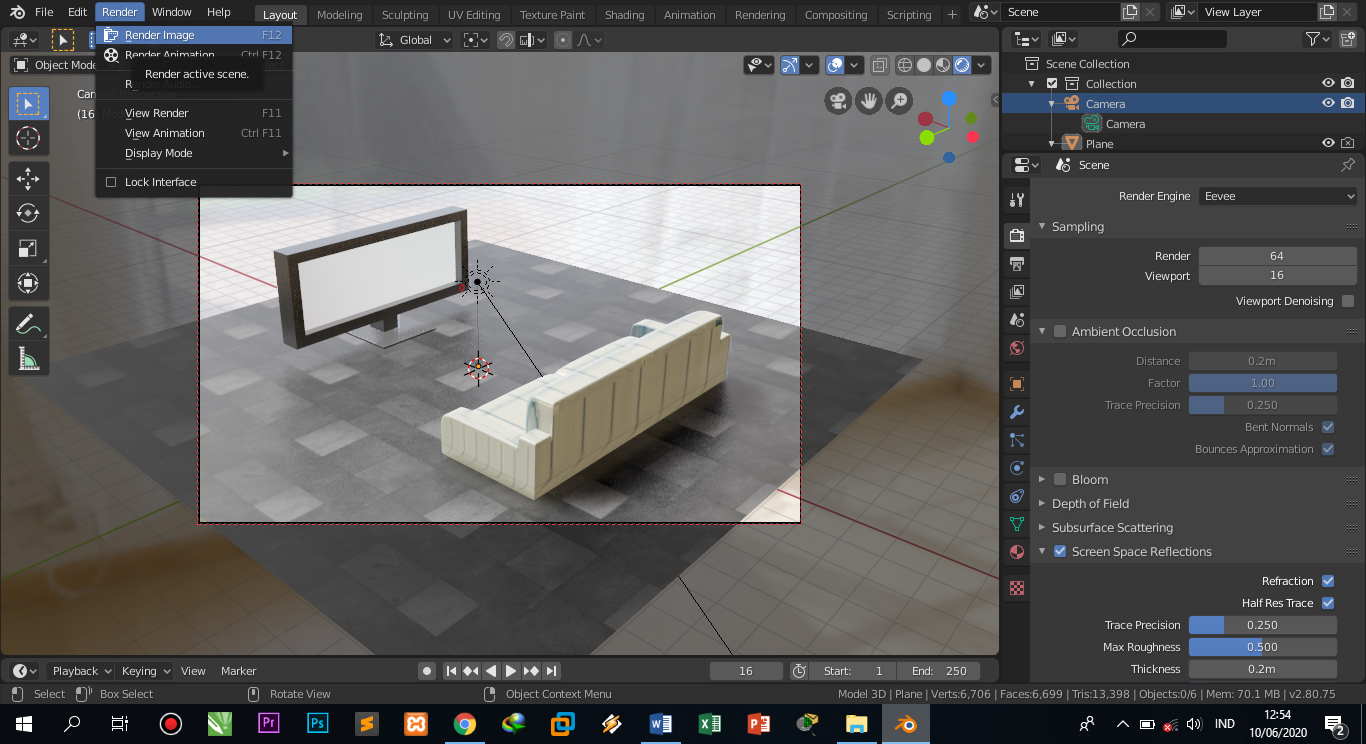 |
| Figure 26. Performing image rendering |
Image rendering results
The rendering results can be seen in Figure 27, which measures 1920x1080 pixels and takes 29 minutes 51 seconds, for the memory used is 89.30Mb.
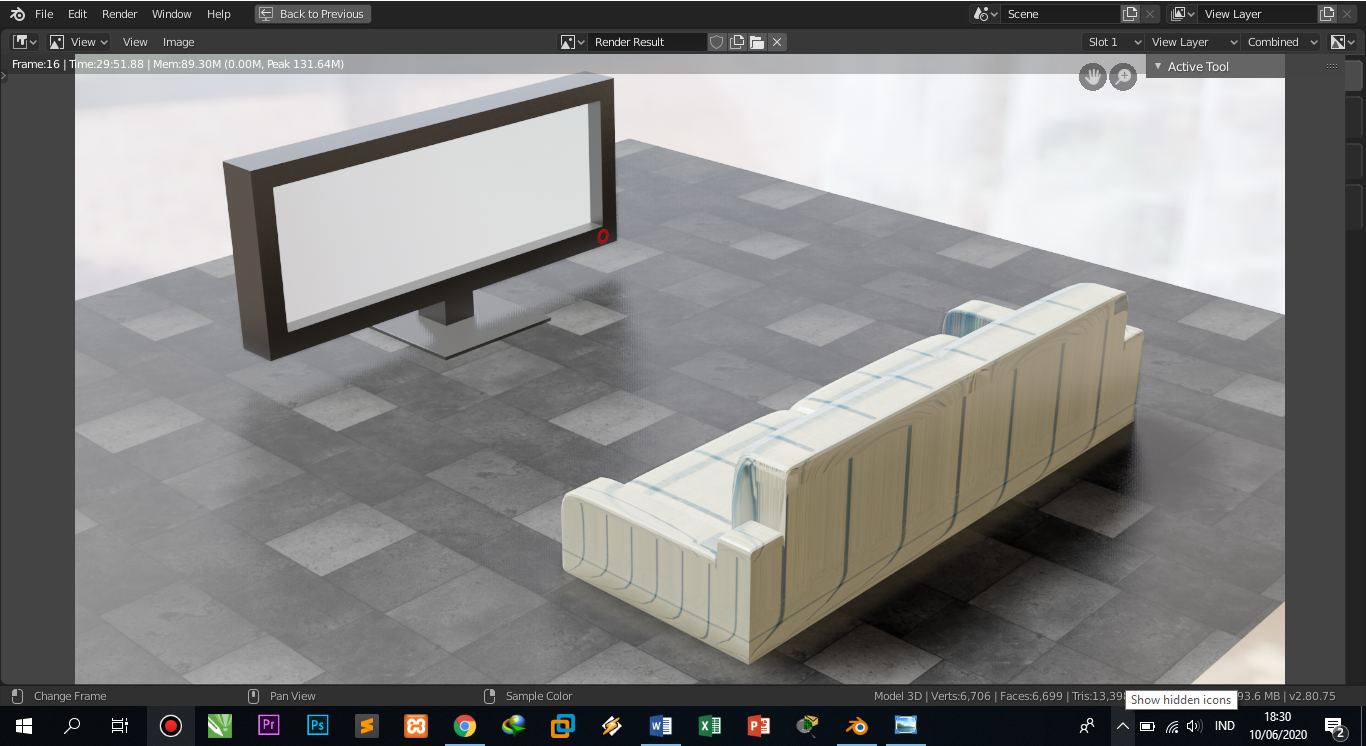 |
| Figure 27. Image rendering results |
Then save the image, by clicking on the image, then save or you can click the alt + s shortcut directly. After that, select a folder to save as desired.
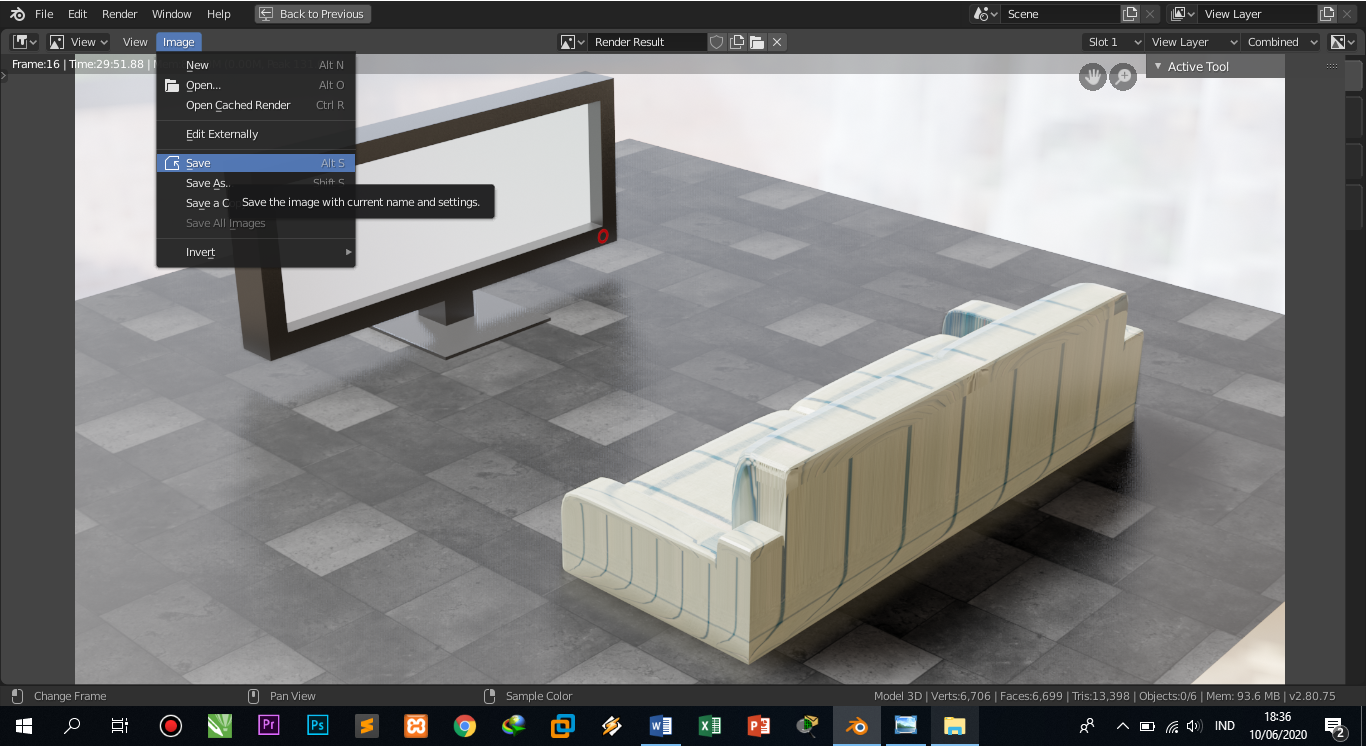 |
| Figure 28. Saving the rendered image |
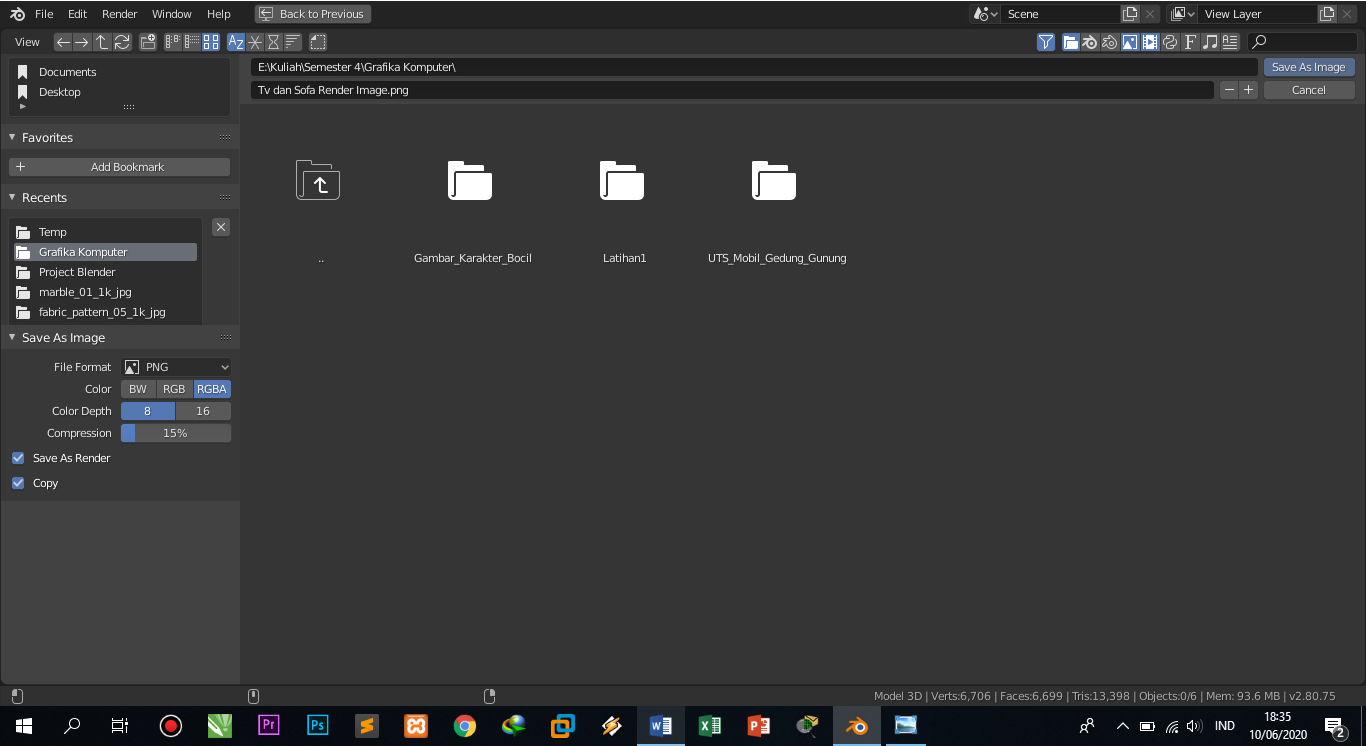 |
| Figure 30. Results Saving image rendering image |
 |
| Figure 30. Results Saving image rendering image |